Toileting is probably the subject, that people who are facing a posterior or lateral approach hip replacement, are most embarrassed to talk about, but you have too.
When my mom had her hip replacement, we asked about what the problems would possibly be, and what I as a caregiver would have to do. We were doubly lucky though, firstly there are assistive devices to help with this, so my mom would get to keep her privacy (probably), and secondly, it turned out that because Mom is of a very slight build, she did not have difficulty with her personal care.
For toileting after a posterior or lateral approach hip replacement, you will need to learn how to use –
- a raised toilet seat and a walker to sit down and to stand up correctly
- some form of bottom wiping device or handheld bidet if you are a larger person
If you had an anterior approach hip replacement, unless you are having a lot of pain bending, you will have no need to follow any of this.
CONTENTS - Overview & Quick Links
Assistive devices to help you with toileting
How high should a raised toilet seat be after a hip replacement ?
Sitting on a toilet after a hip replacement
When can you use a regular toilet after a hip replacement ?
Helpful items for after a hip replacement
How soon can I take a bath after a hip replacement ?
Using a recliner after a hip replacement: Can you do it ?
Lifetime precautions after a hip replacement
Best raised toilet seats after a hip replacement
- Best raised toilet seats after a hip replacement for an elderly senior
- Best raised toilet seat after a hip replacement for a larger, elderly senior
- Best raised toilet seat after a hip replacement for a younger senior in good shape
- Best raised toilet seats after a hip replacement for larger, younger seniors
Assistive devices and equipment for toileting after a hip replacement
A number of devices, and certain models of raised toilet seat, which will give make it easier to wipe yourself on the toilet, without leaning forwards and hurting yourself –
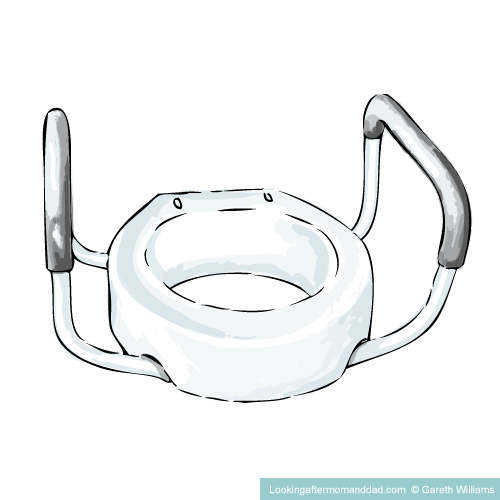
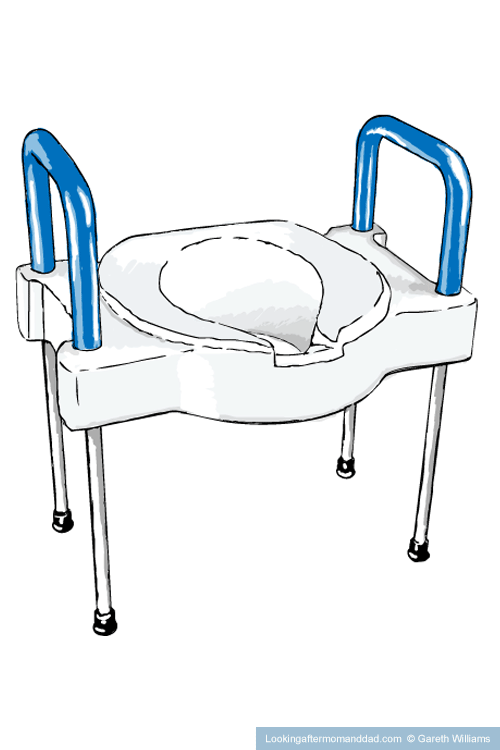
Open Front Raised Toilet Seats
There are both safety frames with raised toilet seats, and 3-in-1 bedside commodes, which have seats which are open at the front allowing more room greater for personal care.
Toilet Aids for wiping
The “Freedom Wand” is an assistive made from tubular plastic, device which has a little gripper on the end.
You put the toilet paper or wipes in the gripper, retract the gripper, to hold the toilet paper firmly, and then clean yourself.
The device has a number of extensions which allow you to extend it all the way up to 30″ in length – the wand can be 7″, 14″, 21″, 25″ or 30″ long.
It disassembles easily and can be thoroughly washed in at a sink in water with some detergent – the head of the device with the gripper actually has a hole in it to allow water to run through it for cleaning.
“Comfort Wipe” is another very similar assistive device.
It has a different type of gripping system for the toilet paper or moist wet wipes, but is very similar, although the handle only extends your reach by 15″.
Handheld bidet sprayer
Handheld bidet sprayers are another very good option – my favorite, which can be attached to your toilet water inlet valve on a hose
When you have used the toilet, you can take the handheld spray and clean yourself.
This is actually to do if you have a raised toilet seat with an open front, as you will have lots of room to place the device where you need it, and then to direct the spray as needed.
How high should a raised toilet seat be after a hip replacement
If you have had a posterior or lateral approach hip replacement, when you sit on any seat, you want your hips to be at a greater height from the floor than your knees. So –
1) measure the height of your knees from the floor
2) measure the height of your toilet seat
If your knees are higher than the toilet seat (if your knees are lower than the toilet seat, you do not need a raised toilet seat)
3) subtract the height of the toilet seat from the height of your knees, and that is the height of the raised toilet seat you need

You can go an inch or two higher if you want, but you do not want to have your feet dangling in the air when you are seated, as this can cause accidents when standing up.
This by the way is not all you need to be measuring for a raised toilet seat, as there are different models of toilets – elongated and standard, and not all raised toilet seats fit all toilets. That is, unless you are buying a raised toilet seats in a safety frame or a 3-in-1 bedside commode, which can be used over any toilet.
To find out how to check and measure the toilet to see if you have an elongated or a standard toilet bowl – that’s important too – and how to measure yourself, to find the height of seat you require, you can read this article is here – “How To Measure For A Raised Toilet Seat”.
Sitting on a toilet seat after a hip replacement
Sitting on the toilet is one of the situations in which you are putting a lot of stress on your new hip, so you need to know how to do things without causing injury to yourself.
The individual who has had the surgery, and the caregiver if there is one, both need to know how the sitting on the toilet, and the getting up from the toilet, are done.
As I just looked at, you will probably need to raise your toilet seat height, you are going to need some form of raised toilet seat.
If you don’t know anything about raised toilet seats, here is an article that you can look at, “Types Of Raised Toilet Seats: All You Should Know Before You Buy”, in which I go into depth about all the types, and provide lots of different examples of each. In all, I discuss 13 different types of seats which you can use with multiple examples of each, and which seats are best for which situations.
If you don’t have the time for that, I have a much shorter section on the different types further at the end of this article.
A few important points to make here about raised toilet seats are –
- you will want to have the correct weight capacity, so check out my huge list of raised toilet seats, their product numbers and weight capacities, it’s all in one post, “Raised Toilet Seat Weight Capacity: Over 180 Examples”
If you have decided to use a bedside commode over the toilet as a raised toilet seat, which was our solution for my mom, then there are a few points you will need to look at for those as well –
- there are also different weight capacities of bedside commode, and you need to pick the right one for you, so I have an article with a huge list of bedside commodes, model numbers and their weight capacities, where you can start to narrow down your search, “Bedside Commode Weight Capacity: A Guide With Over 140 Examples and Illustrations”
- to learn how to use, and set up, a bedside commode over your toilet, you can read this article, “Can A Bedside Commode Be Used Over A Toilet ?”
How to sit down on a raised toilet seat with armrests
In this section I’ll look at – how to sit down on a raised toilet seat with armrests, how to stand back up, and how to use a walker to assist with balance and stability.
If you want a fully illustrated guide I have an article all about this, which I mentioned in an earlier section of this article, which you can find here – “How To Sit On A Toilet After Hip Surgery: A Detailed Illustrated Guide”
To sit down
Step 1
Slowly back up to the toilet with the aid of the walker
Step 2
When you feel the seat against the back of your legs, stop backing up.
Step 3
Pull down any clothes you need to, using the hand on the side of the non-operated hip.
After lowering your garments, hold onto the frame with the same hand again.
Next, extend the leg with the hip replacement slightly out in front of you.
Step 4
With your hand on the side of the hip replacement, reach back for the armrest of the raised toilet seat.
You can let go of the walker on the other side, once you have the armrest in your grip, and take hold of the other armrest on the raised toilet seat.
Take your weight with your arms and good leg, and start to lower yourself onto the seat.
Keep your back straight as you lower yourself, and don’t lean forwards.
Step 5
Sit down on the front of the raised toilet seat, do not attempt to sit down as far back as you can at first.
Step 6
Lift yourself slightly with your arms, to scoot back deeper into the seat, so you are sitting on it properly – don’t lean forwards, just take your weight with your arms, and use your good leg to help a little.
To stand up
Step 1
Stretch your operated leg slightly out in front of you.
Keeping your back straight, take hold of both armrests, and using your arms to lift you up a little, scoot yourself to the front edge of the seat
Step 2
Before standing up, you want to have your good leg tucked slightly further back than usual– in this position your leg will be able to provide more force, without causing you to lean forwards.
Step 3
Now, push up vertically with your good leg and both arms, keeping your back straight, and without leaning forwards.
All this time, your operated leg should be extended out in front of you, and not taking any weight.
Step 4
Once your arms are fully up, with your hand on the hip replacement side grab hold of the walker, while you still have the armrest of the raised toilet seat in your other hand.
Step 5
Next, let go of the armrest on the raised toilet seat, and take hold of the walker with your hand on the other side.
Step 6
Once you have both hands on the walker, and your weight is on your good leg, you can bring the leg with the hip replacement back into a normal position, and stand normally, weight-bearing as you have been advised.
Sitting on a toilet seat or raised toilet seat without armrests
To sit down
Step 1
Back up to the toilet with the walker until you feel the seat against the back of your legs.
Step 2
Stretch your leg with the hip replacement slightly out in front of you.
Step 3
With your other hand on the side of your non-operated hip, reach back to the raised toilet seat while keeping holding on to the walker with the hand on the side of your operated hip.
Step 4
Sit back on the raised toilet seat once you have your hand on it, and use your hand to help lower yourself to the seat, taking your weight.
You can let go of the walker with your other hand once you are seated.
Step 5
With your hands on either side of the raised toilet seat, push up to lift yourself slightly, and scoot back further into the seat.
To stand up
Step 1
Place your hand on the side of your hip replacement, on the walker, and scoot forwards to the edge of the raised toilet seat. Because the seat has no armrests, you will have to scoot forwards the best you can.
If you need to use your other hand, on the non-operated side, place it on the raised toilet seat slightly behind you, and push up a little and forwards.
You place your hand a little towards the rear of the raised toilet seat is to avoid it tipping as you push down on it to lift yourself up a little.
Step 2
Stretch the operated hip leg hip slightly out in front of you, tuck your good leg in under you, close to the toilet.
The hand, on the side of your operated hip, should still be holding on to the walker.
Step 3
Now with your hand, on the side of your operated hip, holding on to the walker, use your other hand, to push up from the raised toilet seat, along with your good leg.
Again, the hand on the raised toilet seat must be as far back as when you push up. If you place it too far to the front of the seat, when you push up, you can make the seat tip.
Step 4
To stand up, you are using your good leg, and your arm pushing up from the raised toilet seat to give you all the power.
Step 5
Now you are standing, take hold of the walker with the hand that you used to push up from the toilet, and stand using the walker.
Step 6
You can now bring your extended hip replacement leg, back into a normal standing position, in line with to your good leg.
When can you use a regular toilet seat after a hip replacement ?
If you have been instructed to use a raised toilet seat after hip replacement surgery, you will typically have to use it for between 6 and 10 weeks, before you can return to using a regular toilet seat again.
The exact time frame is going to depend on your age, state of health, your type of surgery.
When you see your surgeon at the 6-week post-surgery assessment, you will be told how you are progressing, and most likely when you can stop using the raised toilet seat.
While you are looking for raised toilet seats, there is lots more that you can do to make your bathroom a safer place for seniors, or anyone else with mobility issues.
To find out all the different things you can do, to have an instant impact on bathroom safety, take a look here, “54 Bathroom Safety Tips For Seniors – A Helpful Guide”.
Helpful items for after a hip replacement
As well as the assistive devices that you can find for toileting, there are many other devices which can be very helpful for coping with the somewhat restrictive precautions around bending down after hip replacement surgery.
Here’s a list of some of the most frequently used –
General Aids
– Reacher/ grabber
– a leg lifter
Walking Aids
– A walker
– Walker pouches
– Canes
Dressing Aids –
These are inexpensive little devices, that can really make dressing much more comfortable, allowing you to perform tasks without bending over or reaching down and injuring your new hip, such as putting on socks, or pants.
– Elastic shoes laces
– Slip on Shoes (not a device, I know, but they make life easier)
– Long handled shoe horn
– Sock Aid
– Dressing stick
Bathing aids
– Bath transfer bench – a seat which is partly in the tub, and partly out of the tub, and which you use to transfer from outside to inside the tub, and back again, without hurting your hip
– Bath board – is placed across the tub sides and allows you to sit over your bathtub and wash
– Shower chair
– Long handled sponge
– Hand-held shower head
– Non-slip rubber mat
– Grab bars – I prefer the type which have a rough engraved grip, as your hands don’t slip when they are wet.
– Toilet safety frame – a toilet safety frame is really just a set of big armrests which fits onto your toilet or over it, giving proper support when you are sitting down or standing up.
How soon can I take a bath after a hip replacement ?
This is question has a number of answers –
1) You should not submerge your hip wound underwater, until your surgeon, or nurses, have said that it is okay to do so. Typically, you will have to wait 6 weeks before you can immerse your hip in a bath, hot tub or swimming pool, but you should always ask your doctor first. This applies to all types of hip replacements
2) If you had a lateral or a posterior hip replacement, you cannot get into the bathtub and sit on the bottom of a bath tub for approximately 12 weeks. you have to wait for all the muscles to heal.
3) Typically, a patient will be asked to keep their stitches dry for around 48 hours.
For a complete answer you will have to ask your surgeon or nurses as they will be the only ones familiar with the type of dressing that you have.
Some dressings are waterproof, and some are not, and some patients will have dissolving stitches, and others may have staples.
Bathing on a bath board, or on a transfer bench
So long as you –
- observe the precautions for bending down
- stay above the water level
- observe the guidelines for your dressings
- use a long handled sponge
- use a handheld shower head
- get in and out using a leg lifter and don’t break the 90 degree rule
- ask your surgeon or nurses what type of dressing you have, and if it needs to be covered if it is not waterproof
- know whether you can get your stitches wet
- know what to do if you get them wet
You can do this once you are home – it will be much easier with the help of a carer, though.
Showering in a shower is also a lot easier, and somewhat safer, as it does not involve the sides of a bathtub.
Taking a shower after a hip replacement
You will probably be told that you can shower quite quickly after your operation.
It’s best to –
- use a shower chair
- use a handheld shower head
- soap on a string
- ask your surgeon or nurses what type of dressing you have, and if it needs to be covered if it is not waterproof
- know whether you can get your stitches wet
- know what to do if you get them wet
Using a recliner after a hip replacement: Can you do it ?
Ask your surgeon if you can use a recliner.
Some clinics and surgeons say not to sit in sofas, low seats, and recliners, while others say that recliners are fine.
For individuals who have had posterior or lateral approach hip replacements, the recliners are often lumped in with soft chairs sofas and other low seats, but of course not all recliners are low, so it doesn’t make a lot of sense.
I am no expert on this, and I saw many contradictory statements on different websites, so I have collected together the issues that related to recliners.
The issues around recliners to relate to –
- the height of the seat
- the type of reclining mechanism and lift mechanism
- do you strain yourself getting the recliner back to the upright seated position
- are you breaking the 90 degree rule when you stand up
- can you scoot forwards (they have deep seats) to the edge of the seat without hurting the hip, to stand up
- are you strong enough in the arms to stand up from the seat, without hurting your hip by leaning forwards (which you should not do)
- does the seat have an electric lift mechanism
- if you have an electric lift mechanism (which will lift you to a standing position), is the seat actually high enough from the floor that your hip is not lower than your knees when you are seated upright
General opinion would seem to say that they are great to sit in, in a reclined position (never breaking the 90 degree rule), but getting in and out appears to be the main issue.
With regard to anterior hip replacements, there are two precautions with recliners-
- do not sleep in them as it will lead to your hip stiffening up
- do not use them if they have a very low seat, and you are tall
Once again, I would say talk with your surgeon and find out if they advise a recliner in your case, and if so which type, and if they say yes, get them to tell you what seat height you need.
Lifetime Precautions after a hip replacement
Once your recovery period is over, and your hip the muscles and other soft tissues been given the time to heal, and you have done your strengthening work, you should be able to return to activities such as exercise and sports.
Typically, surgeons recommend that patients could return to sports activities 3 to 6 months after surgery.
Lifetime precautions after a hip replacement, are more related to materials that make up your hip replacement implant, and what you will be advised not to do, will depend on the type of materials in your hip implant – metal ceramic polyurethane.
Typically, most people will be advised that swimming, bowling, stationary biking, dancing and walking are allowed – known as low-impact activities.
Surgeons may say those patients with “experience”, can do downhill skiing, cross-country skiing, weightlifting, ice-skating and Pilates.
High-Impact sports, which includes sports like racquet ball, squash, football, soccer, rugby, baseball, softball, jogging and sprinting, are totally advised against.
These recommendations came from a study in 2005, in which data from 614 surgeons were collected, to assess what was “allowed”, “allowed with experience” and “not allowed” after a hip replacement.
“The current recommendations of allowable or recommended activities are derived from surveys of hip and knee surgeons based on clinical experience and preference, not prospective and retrospective analyses.”
These results are derived from what surgeons thought was good for their patients, and are not based on actual statistics of hip replacement failure from taking parts in activities. I thought that was interesting to note.
Depending on which type of material your hip replacement is made of, you will be advised as to which activities you can take part in safely.
“Polyethylene wear and the associated prosthetic loosening are the most common causes of post‐operative failure and the need for revision surgery. Therefore, activities that potentially expedite the wear through increased frequency or magnitude of loading (such as high impact sports) is a primary concern. To date there is limited information on the specific relationship between wear and sporting activities.”
The particular quotes above, and much of the information, are from the – IJSPT – International Of Sports Journal Physical Therapy – Nov 2014 –
“Sports Participation Following Total Hip Arthroplasty”
– by Erik P. Meira, PT, DPT, SCS, CSCS and Joseph Zeni Jr, PT PhD
You can find the article on the US National Library of Medicine National Institutes of Health website here –
https://www.ncbi.nlm.nih.gov/pmc/articles/PMC4223292/
If you read the article I have linked to above, you will see that there are also risks from wear down different parts of the hip, and that small particulates can be ground off and get into the tissues, which can lead to pain and other complications.
And that there is an assumption, that less vigorous, and a more low-impact activities may lead to fewer particulates grinding off the implant and entering into the soft tissues.
Finally, there is the lifetime of your hip replacement – (according to webmd.com)
“95% of hip replacements last at least 10 years, about 75% last 15 to 20 years, and just over half last 25 years or more.”
So, look after your hip implant, and don’t grind it too much when participating in sports, but do take part in sports regularly !
Best raised toilet seats after a hip replacement
For more information in detail, about why I think these are the best raised toilet seats for after a hip replacement, you can go read my article here – “Best Raised Toilet Seats After A Hip Replacement”
This is the list of what I think are the best models of raised toilet seats for after a hip replacement, depending on the age and weight of the user –
Best raised toilet seat for the elderly after a hip replacement
1) OasisSpace Stand Alone Safety Frame and Raised Toilet Seat – with a hard seat
2) OasisSpace Stand Alone Safety Frame and Raised Toilet Seat – with a padded seat
3) PlatinumHealth Ultimate Raised Toilet Seat (safety frames with raised toilet seat)
4) Medline – basic 3-in-1 Bedside Commode
5) Nova Drop-Arm Padded Commode
6) PlatinumHealth GentleBoost Uplift 3-in-1 Commode and Shower Chair
Best raised toilet seat for larger elderly seniors (over 350 lb) –
1) Nova Heavy Duty Drop-Arm Commode 8583
2) Drive Deluxe Bariatric Drop-Arm Commode 11135-1
Best raised toilet seat after a hip replacement for a younger senior in good shape
Risers with armrests –
1) Nova 3.5″ raised toilet seat riser with arms (standard), Model No. 8344-R
2) Nova 3.5″ raised toilet seat riser with arms (elongated), Model No. 8343-R
3) Vive 3.5″ toilet seat riser with handles (standard), Model No. LVA1071S
4) Vive 3.5″toilet seat riser with handles (elongated), Model No. LVA1071E
Front locking raised toilet seat with armrests
1) Vive raised toilet seat with detachable handles, Model No. LVA10011
2) Drive Medical Premium plastic raised toilet seat with armrests, Model No. 12013
3) Nova raised toilet seat with detachable arms, Model No. 8351-R
Best raised toilet seats after a hip replacement, for larger, younger seniors (over 300 lb)
1) Nova Heavy Duty Drop-Arm Commode, Model No. 8583 – 500 lb weight capacity
2) Drive Deluxe Bariatric Drop-Arm Commode, Model No. LVA1071S – 1000 lb weight capacity
Types of raised toilet seat
For an in depth look at all the types of raised toilet seats, how they work, fit to the toilet, what advantages each type has, lots of different examples of models, the weight capacities of the different models etc., I have an article here – “Types Of Raised Toilet Seats: All You Should Know Before You Buy”.
This is the short version below, with illustrations of each type, and a brief explanation of to whom, the different seats are best suited.
Raised toilet seats for a temporary situation
The two seats below are really only meant to provide a portable solution.
The models have no armrests, so for older users in particular, you would do well to have a grab bar on the wall, or a toilet safety frame.
My mom and I tried some different models, and found them wholly unsuitable for an elderly adult, let alone one who had recently had a hip replacement.
Bubble seats
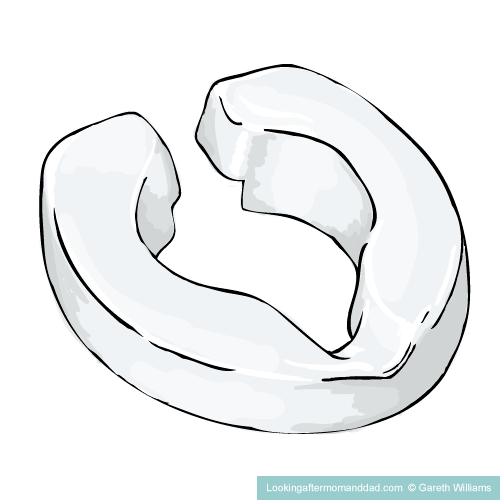
Clip-On seats
Raised toilet seats for medium term use
The following three types of seats, are more solid and somewhat can be more solidly secured to the toilet with various plastic clamping systems, flanges and bolts, but they still are prone to moving around.
Some models only fit either an elongated, or a standard shaped toilet, and although a lot of the front locking toilets say they fit all toilet shapes, this is not always true.
The Clipper seats and the Front Locking types of seats can be bought with armrests.
These seats may be fine for younger users with one good leg and no problems with no other mobility problems, but I don’t feel good about suggesting them for long-term use by an elderly adult.
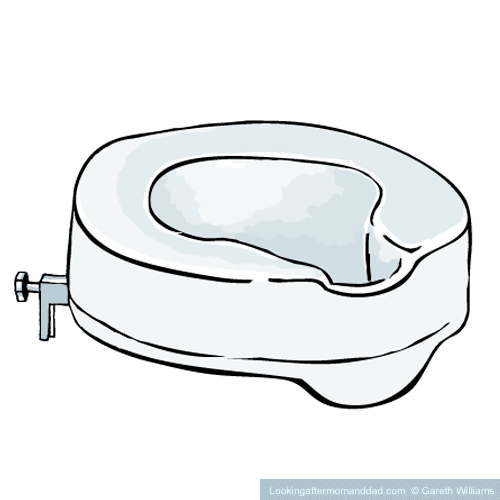
Seats with side fixings
Clipper Seats

Front locking seats
The Raised toilet seats for long-term use
The following seats are designed for long-term use, and are well suited to be used by an elderly person.
Tall Seats, or seats with spacers, although very secure don’t have armrests, so they require the addition of grab bars if they are for an elderly adult.
The toilet plinth, or base riser, may be a bit over the top, for just a brief period after a hip replacement, unless you are not looking to raise the toilet permanently.
My favorites types of raised toilet seats are the last four types –
- raised toilet seat with legs
- safety frames with raised toilet seats
- 3-in-1 bedside commodes
- toilet plinth or base riser
Raised toilet seats with legs, safety frames with raised toilet seats, and 3-in-1 commodes can be lifted from over the toilet in seconds, whereas the risers need to be unbolted, and then the seat and lid, have to be put back, all of which takes time.
For individuals requiring a raised seat a weight capacity of 400 lb, or more, and a lift of more than 2 inches in extra height, there is only one option, a bariatric 3-in-1 style bedside commode.
For larger individuals needing just 1 or 2 inches, Big John toilet seats (the only other option with a high weight capacity) are a great choice. As there are no armrests on Big John seats, you will need either a safety frame over the toilet as well, or grab bars on the wall.
3-in-1 commodes, my preferred raised toilet seats for the elderly, come in a variety of seat widths, aperture sizes, with elongated seats and seat heights, not available in any other form of raised toilet seat.
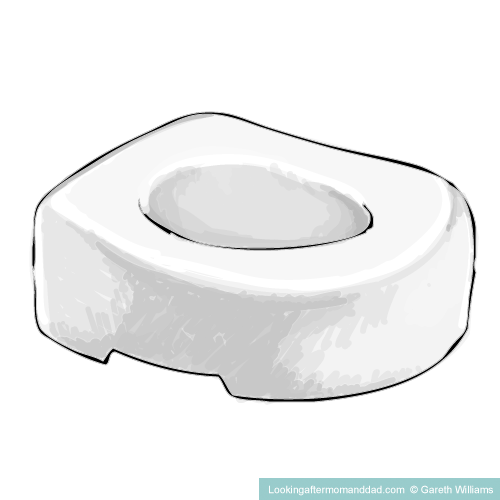
Tall seats
Risers
Raised toilet seats with legs
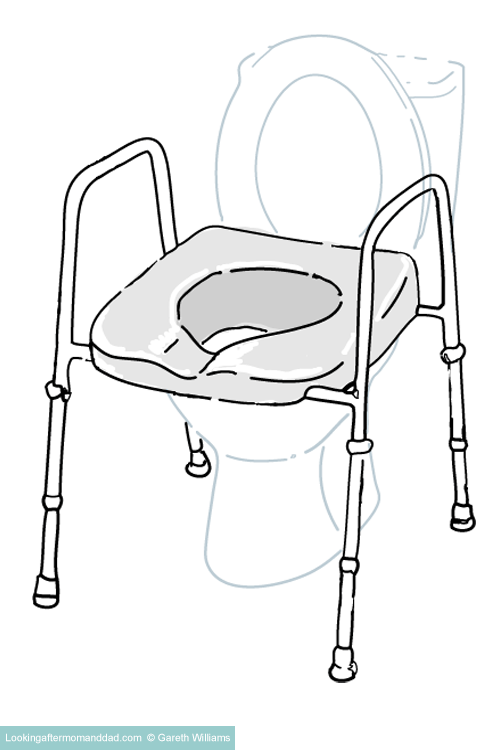
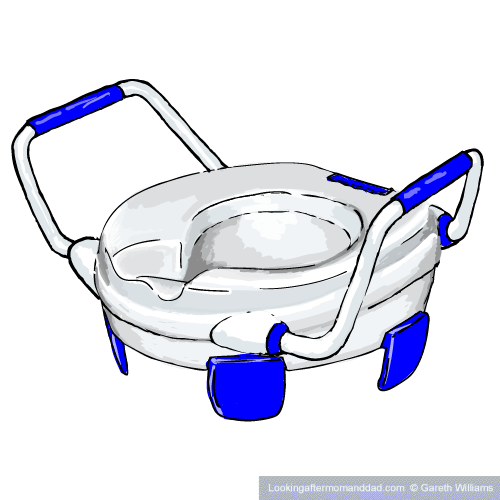
Safety frames with raised toilet seats
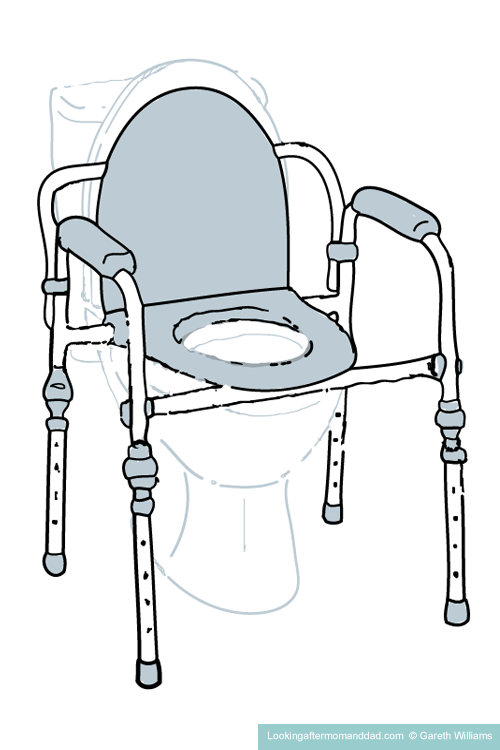
3-in-1 bedside commode
Toilet Plinth or Base
How to choose a raised toilet seat ?
To make an informed choice of raised toilet seat, you need to ask yourself many different questions about –
- the height you need
- the weight capacity you need
- the features you need
- the space it is going in
- the height of your toilet
- the state of health of the user
- the age of the user
- does the user have any specific medical conditions ?
- is the seat for post surgical recovery ?
There are also questions about the brand, where to buy it, and also can you get it covered by medical insurance.
If you are still stuck, and want more specific advice on how to choose a raised toilet seat, which is right for you, and your loved one, I have a very in-depth article which outlines all the questions you should be asking yourself, along with a PDF that you can download and print out for free – “How To Choose A Raised Toilet Seat ?”
Sources for this article –
https://www.edwinsu.com/anterior-hip-replacement-post-op-instructions.html
https://www.newyorkhipknee.com/faqs/total-hip-replacement-faqs/
https://www.stefankreuzermd.com/anterior-hip-replacement.html
https://www.orthonewengland.com/wp-content/uploads/sites/156/2018/02/KENNON-DISCHARGE-INSTRUCTIONS-HIP-2016.pdf
https://www.nwh.org/classes-and-resources/patient-guides-and-forms/joint-replacement-surgery-patient-guide/joint-replacement-faqs
https://www.ncbi.nlm.nih.gov/pmc/articles/PMC4223292/
I’m Gareth, the author and owner of Looking After Mom and Dad.com
I have been a caregiver for over 10 yrs and share all my tips here.